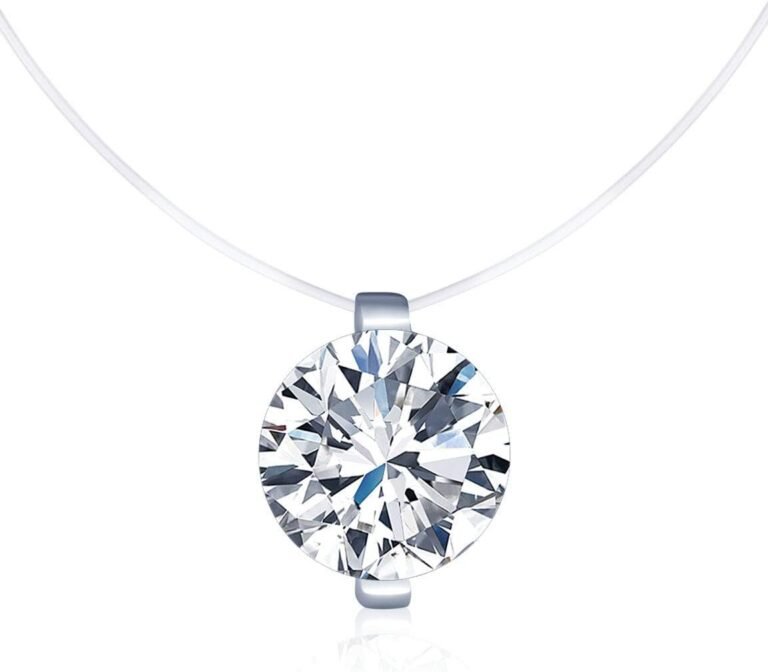
How to Hang a Pendant Necklace: 3 Easy Methods
The easiest way to hang a pendant necklace is to use the built-in clasp at the back of your neck. Simply hold both ends of the chain, bring them together behind your neck, and secure the clasp. You don’t need any tools or special tricks for most standard pendant necklaces.
That said, getting the pendant to sit perfectly centered can be a little tricky. We found that the chain often twists, or the pendant slides to one side. Positioning the pendant at the front before you clasp is the key to a polished look. Adjusting the length also changes how the pendant frames your outfit and neckline.
- Unclasp the necklace and lay it flat to untangle any knots.
- Hold both ends of the chain in one hand, letting the pendant hang down.
- Reach behind your neck and bring the two clasp ends together.
- Secure the clasp, then check that the pendant is centered in the mirror.
- Adjust the chain length using any jump rings or a slider bead if you have them.
Below, we break down the easiest methods for putting on a pendant necklace by yourself, plus a few simple fixes for common problems like tangled chains or a clasp that’s hard to reach. Let’s walk through it step by step.
Mastering the Art of Pendant Necklace Placement
Getting a pendant to hang just right is a small skill that makes a big difference. We found that most people struggle with the same two things: reaching the clasp and keeping the pendant centered. The good news? Both are easy to fix with a few simple tricks.
Think of your necklace like a picture frame. You wouldn’t hang a frame crooked and call it done. The same logic applies here. A centered pendant frames your face and outfit perfectly.
Why the Pendant Slides to One Side
You clasp it perfectly, look in the mirror, and the pendant sits off to the left. Frustrating, right? We found that this happens because the chain twists as you bring the ends together behind your neck.
Another culprit is the clasp itself. Most clasps have a small weight to them. That weight can pull the chain slightly, dragging the pendant off-center. Many jewelry experts say this is the most common complaint they hear from customers.
The Gravity Factor You Can’t Ignore
Gravity is always working. When you reach behind your neck, the front of the chain dips down. The pendant follows that dip. If you clasp the necklace while the front is dipping low, the pendant will sit lower and off to the side.
Here is the fix. Before you clasp, pull the pendant to the front center of your chest. Hold it there with one finger. Then, bring the clasp ends together behind your neck. This simple move keeps everything balanced.
Step-by-Step Guide to Hanging Your Pendant Necklace Alone
You do not need a second person for this. With a little patience, you can do it yourself in under a minute. We broke down the process into simple, repeatable steps that work for any chain type.
Start by finding a well-lit mirror. Natural light is best. You want to see what you are doing, especially if your chain is delicate or your clasp is tiny.
Step 1: Prepare the Necklace on a Flat Surface
Lay the necklace flat on a table or counter. Untangle any knots gently. Use a pin or needle for stubborn knots if needed. We found that working on a flat surface prevents new tangles from forming.
Check the clasp. Make sure it is fully open and ready to go. A stuck clasp will only cause frustration mid-process. If it feels stiff, work it open and closed a few times before you put it on.
Step 2: Position the Pendant at the Front
Pick up the necklace by the clasp ends. Let the pendant hang down naturally. Now, place the pendant against your chest at the spot where you want it to rest. Hold it there with your thumb.
This step is the secret to a centered look. By holding the pendant in place, you prevent it from sliding around while you work the clasp. It takes a little coordination, but you will get the hang of it quickly.
Step 3: Bring the Ends Together Behind Your Neck
With one hand holding the pendant at your chest, use your other hand to bring one clasp end around your neck. Then, bring the other end around. Meet them at the back of your neck.
This is the tricky part. You cannot see what you are doing. We found that using your middle fingers to feel for the clasp works best. Your middle fingers are longer and have more dexterity than your index fingers.
Using a Mirror for the Back View
Stand with your back to the mirror, holding a hand mirror in front of you. You can see the back of your neck in the hand mirror. This gives you a clear view of the clasp. Many people find this trick to be a total game-changer.
If you do not have a hand mirror, use the front camera on your phone. Set it to selfie mode and angle it to see the back of your neck. This works just as well and is always available.
Step 4: Secure the Clasp and Check Your Work
Once the clasp is connected, let go of the pendant. Look in the mirror. Is the pendant centered? Is it sitting at the right height? If not, adjust it gently by sliding the pendant along the chain.
Run your fingers along the chain to check for twists. A twisted chain looks messy and can cause the pendant to hang crooked. Smooth out any twists you find before you head out the door.
Simple Fixes for a Stubborn Clasp
Some clasps are harder to manage than others. Lobster clasps are common but can be tiny. Magnetic clasps are easier but sometimes weak. We found that knowing your clasp type helps you choose the right strategy.
If you have arthritis or limited hand mobility, standard clasps can be a real challenge. There are simple tools that can help, and you can also modify how you approach the clasp.
Tools That Make Clasping Easier
A magnetic clasp extender is a great option. It attaches to your existing clasp and turns it into a magnetic closure. You just bring the two ends close, and they snap together. No fiddly pinching required.
Another option is a necklace clasp helper. This is a small handheld tool with a hook on one end. You hook the clasp, bring it around your neck, and connect it with ease. Many occupational therapists recommend these tools for people with dexterity issues (Mayo Clinic).
When to Replace a Weak Clasp
If your clasp keeps popping open, replace it. A weak clasp is a disaster waiting to happen. You could lose a precious pendant down a drain or on a busy sidewalk. We found that replacing a clasp costs very little and saves a lot of heartache.
Take the necklace to any local jeweler. They can swap out the clasp in minutes. Most jewelers charge a small fee for this service. It is worth every penny for peace of mind.
Adjusting the Chain Length for the Perfect Pendant Drop
Where your pendant sits changes your whole look. A high pendant near the collarbone feels classic and refined. A longer pendant that rests on the chest feels bolder and more casual. The right length depends on your outfit and neckline.
We found that most people prefer the pendant to sit just below the collarbone. This length works with almost any neckline. It frames the face without getting lost in the outfit.
Using Jump Rings to Shorten the Chain
Many pendant necklaces come with extra jump rings. These are small metal loops along the chain. You can hook the clasp into a different jump ring to change the length. It is a simple adjustment that takes seconds.
Look closely at your chain. If you see small loops every inch or so, you have a multi-length chain. Use these to customize the drop. We found that shortening the chain by one inch makes a noticeable difference in how the pendant sits.
Slider Beads for Quick Adjustments
Some necklaces have a slider bead instead of a traditional clasp. This is a small bead that slides along the chain to adjust the length. You simply slide the bead up or down to find your perfect fit.
Slider beads are incredibly user-friendly. They are especially popular on leather or cord necklaces. If your necklace has one, you can adjust the length without removing the necklace at all.
Quick Checklist for a Flawless Pendant Look
Use this checklist every time you put on a pendant necklace. It takes ten seconds and ensures you look polished. We found that people who follow this list rarely have necklace problems.
- Untangle the chain on a flat surface before you start.
- Hold the pendant at your desired spot on your chest.
- Bring the clasp ends together behind your neck.
- Secure the clasp and release the pendant slowly.
- Check for twists by running fingers along the chain.
- Confirm the pendant is centered in the mirror.
Comparing Pendant Necklace Styles and Their Clasps
Different necklaces come with different clasps. Knowing what you have helps you put it on faster. We put together a quick comparison of the most common types you will find in your jewelry box.
| Clasp Type | Ease of Use | Best For | Common Issue |
|---|---|---|---|
| Lobster Clasp | Moderate | Delicate chains | Tiny to grip |
| Spring Ring | Easy | Everyday wear | Can jam over time |
| Magnetic Clasp | Very Easy | People with arthritis | Can be weak |
| Slider Bead | Very Easy | Leather or cord | Can slide on its own |
| Box Clasp | Easy | Heavier pendants | Needs precise alignment |
We found that magnetic clasps are the easiest for most people. They require zero fine motor skills. Just bring the two ends close, and they connect on their own. If you struggle with traditional clasps, this is a great upgrade.
Keeping Your Pendant Necklace Tangle-Free
Tangled necklaces are the enemy. Nothing ruins a morning routine faster than a knotted chain. We found that proper storage prevents most tangles before they start. A little care goes a long way.
Store each necklace separately. Do not toss them all in a jewelry box together. They will tangle into a mess overnight. A simple hanging organizer or individual pouches work best.
Storage Solutions That Actually Work
A jewelry stand with hooks is a simple solution. Hang each necklace on its own hook. This keeps chains separate and tangle-free. We found that this method also makes it easy to see your options when getting dressed.
For travel, use a pill organizer or a straw trick. Thread the chain through a straw and clasp it. This keeps the chain straight and prevents knots. It is a clever hack that frequent travelers swear by.
How to Untangle a Knotted Chain Fast
Do not yank at the knot. That only makes it tighter. Instead, lay the necklace flat and sprinkle a little baby powder on the knot. The powder reduces friction and helps the knot loosen.
Use two pins or needles to gently tease the knot apart. Work slowly and patiently. We found that most knots come undone in under five minutes with this method. It takes practice, but it is a valuable skill.
When to Take Your Pendant Necklace Off
Knowing when to remove your necklace is just as important as knowing how to put it on. Wearing it at the wrong time can damage the chain or the pendant. A little awareness protects your investment.
Take it off before showering or swimming. Soap and chlorine can dull the metal and weaken the chain. Many experts say that water exposure is the leading cause of necklace damage (Cleveland Clinic).
Sleeping and Exercising With a Pendant
Remove your necklace before bed. Sleeping on a chain can bend it or break the clasp. It can also pose a strangulation risk, especially with longer chains. It is simply not worth the risk.
Take it off before workouts, too. Sweat can corrode the metal over time. Plus, a swinging pendant can hit you in the face during certain exercises. We found that keeping a small dish by your bed and gym bag makes this habit easy.
Choosing the Right Chain for Your Pendant
Your chain matters as much as your pendant. A heavy pendant on a delicate chain is a recipe for disaster. The chain will stretch or break under the weight. We found that matching the chain weight to the pendant weight is essential.
Light pendants look great on delicate chains like cable or rope chains. Heavy pendants need stronger chains like box or curb chains. When in doubt, go heavier. A sturdy chain gives you peace of mind.
Chain Lengths and How They Fit
Standard chain lengths range from 16 to 24 inches. A 16-inch chain sits snugly at the base of the neck. An 18-inch chain rests just below
Conclusion
You do not need a second pair of hands to hang a pendant necklace perfectly. The trick is preparation and patience. Lay the chain flat, hold the pendant at your chest, and bring the clasp ends together behind your neck.
Use a mirror or your phone camera to check the back. Adjust the length with jump rings or slider beads for the right drop. Swap out a weak clasp before it causes a lost pendant.
Your next step is simple. Practice the steps in front of a mirror tonight. After two or three tries, you will have it down. You will never struggle with a pendant necklace again.
Frequently Asked Questions
How do I keep my pendant from flipping over?
Pendants flip when the chain twists or the pendant is heavier on one side. Check that your chain is not twisted before you clasp it. You can also add a small silicone disc behind the pendant to keep it facing forward.
Should I hang my pendant necklace on a hook or lay it flat?
Hanging a necklace on a hook is fine for most chains. However, heavy pendants can stretch delicate chains over time. Lay heavy pieces flat in a jewelry tray or pouch to protect them.
Can I wear a pendant necklace every day?
Yes, you can wear a pendant daily if you choose the right materials. Sterling silver and solid gold hold up well. Take it off before showering, swimming, or sleeping to keep it looking new.
How tight should a pendant necklace fit around my neck?
You want about a finger’s width of space between the chain and your neck. This prevents the necklace from feeling too snug or choking. It also lets the pendant sit naturally against your chest.
Why does my pendant necklace keep getting tangled in my hair?
Long chains and fine chains catch hair easily. Keep your necklace shorter if this is a problem. You can also braid or tie your hair back when wearing a delicate chain.