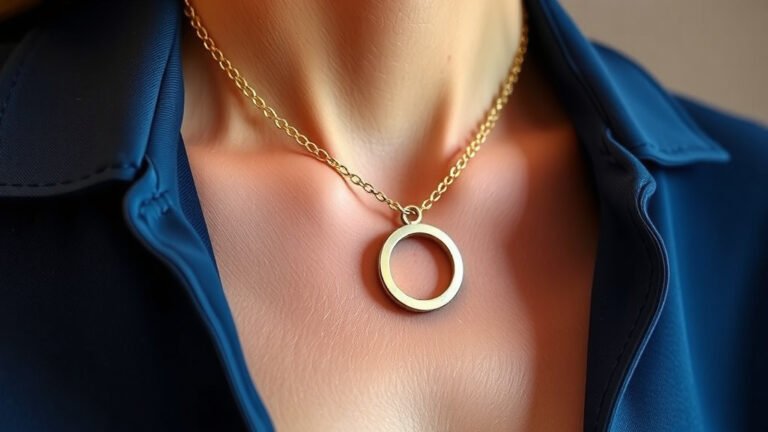
How to Attach a Pendant to a Beaded Necklace
The easiest way to attach a pendant to a beaded necklace is to use a jump ring and a small crimp bead to secure it right onto the strand. You simply open the jump ring, slide it through the pendant’s bail, and then attach it to a sturdy spot on your necklace. This method works for most store-bought and handmade beaded necklaces without needing any special tools or skills.
We found that the key is to place the pendant at the center point of your necklace so it hangs evenly. You can also use a pendant bail or a wire wrap if your bead holes are too small for a jump ring. Many experts say that choosing the right attachment point depends on the weight of your pendant and the size of your beads, so a little planning goes a long way.
- Use a jump ring for a quick and removable attachment.
- Pick a center bead and mark the spot before you start.
- Add a crimp bead to keep the pendant from sliding around.
- For heavy pendants, use a stronger wire or a dedicated bail.
- Always close the jump ring with pliers for a secure hold.
Below, we break down the exact steps for each method, plus the simple tools you need to get the job done right. Let’s walk through how to make your necklace look polished and professional in just a few minutes.
Attaching a Pendant to Your Beaded Necklace the Easy Way
You want a polished look without a trip to the jeweler. We found that the right technique takes about five minutes and a couple of basic tools. The trick is matching the attachment method to your pendant’s weight and your bead hole size.
Most craft stores sell the supplies you need for under ten dollars. You probably already own a pair of pliers. Let’s get your pendant hanging straight and secure.
Choosing the Right Spot on Your Necklace
Center placement is the classic choice. It balances the design and looks natural. We found that marking the exact center bead before you start saves you from a crooked pendant.
Lay your necklace flat on a towel. Fold it in half to find the middle bead. Use a tiny piece of tape or a thread to mark that spot. This is your anchor point.
For asymmetric designs, you can place the pendant off-center. Just make sure the necklace still drapes evenly when worn. A heavy pendant pulls the strand forward, so a center point usually works best.
Checking Your Bead Hole Size First
Not all beads have holes big enough for a jump ring. We found that seed beads and small pearls often have tight openings. If your jump ring won’t slide through, you have two options: use a thinner wire or attach the pendant to the necklace’s clasp area instead.
Measure the hole with the tip of a toothpick. If it fits snugly, a standard 4mm jump ring should work. For anything smaller, consider a wire wrap method.
Using a Jump Ring for a Quick and Secure Attach
This is the go-to method for most pendants. It’s fast, removable, and works with almost any bail style. We recommend it for pendants under 10 grams, like small crystals or light charms.
You need two pairs of flat-nose pliers. One holds the jump ring steady. The other opens and closes it without distorting the shape. This prevents gaps that let the pendant slip off.
Step-by-Step Jump Ring Attachment
Follow these steps carefully. We found that rushing the closure is the most common mistake.
- Open the jump ring by twisting the ends sideways. Do not pull them apart.
- Slide the ring through the pendant’s bail or loop.
- Thread the ring through your marked center bead hole.
- Close the ring by pressing the ends together until they meet flush.
- Give it a gentle tug to confirm it’s locked.
That’s it. Your pendant is now attached and ready to wear. If you want it removable for different outfits, this method is perfect.
When to Skip the Jump Ring
Heavy pendants, like large gemstones or metal charms, can stress a jump ring. Over time, the metal can bend and open. Many experts say that pendants over 15 grams need a sturdier solution.
Also, if your necklace uses stretchy cord, a jump ring can cut into the elastic. In that case, use a dedicated bail that wraps around the cord instead.
Securing with a Crimp Bead for Extra Hold
A crimp bead acts like a tiny clamp. It locks the pendant in place so it doesn’t slide along the strand. We found this especially useful for necklaces with slippery beads like glass or metal.
You’ll need a crimping plier for this method. A regular plier can crush the bead unevenly. The crimping tool folds the bead into a neat cylinder that looks professional.
How to Crimp a Bead onto Your Necklace
Slide a crimp bead onto the necklace wire first. Then add your pendant’s jump ring. Position the crimp bead right next to the jump ring. Squeeze the crimping plier to flatten it into a small tube.
Test the movement. The pendant should stay put but still have a tiny bit of play. If it’s too tight, the pendant won’t hang naturally. If it’s too loose, it will slide around your neckline.
We found that using two crimp beads—one on each side of the pendant—gives the most stability. This is a favorite trick among jewelry makers for keeping pendants perfectly centered.
Crimp Bead Mistakes to Avoid
Do not over-crimp. Squeezing too hard can weaken the wire. Also, avoid using crimp beads on silk or cotton cord. They are designed for flexible beading wire like Soft Flex or Accu-Flex.
If you hear a crunching sound, you’ve crushed the bead too far. Gently open it with pliers and try again with a fresh bead.
Using a Pendant Bail for Heavy or Large Pieces
Pendant bails are small metal frames that wrap around the necklace strand. They distribute the weight evenly. This is the best choice for chunky pendants or those with a large bail hole.
We found that glue-on bails work well for pendants without a hole. You simply apply jewelry glue to the flat back of the bail and press it onto the pendant. Let it cure for 24 hours before wearing.
Choosing Between Glue-On and Clamp-On Bails
Clamp-on bails are easier to remove and reuse. They have a small hinge that snaps shut around the strand. Glue-on bails are permanent but offer a cleaner look.
Here is a quick comparison to help you decide.
| Bail Type | Best For | Removable? | Skill Level |
|---|---|---|---|
| Clamp-On | Medium pendants, quick changes | Yes | Beginner |
| Glue-On | Flat-backed pendants, permanent designs | No | Intermediate |
| Wire Wrap | Heavy stones, custom looks | No | Advanced |
Many experts say that clamp-on bails are the safest for everyday wear. They don’t require glue or heat, so your beads stay safe.
How to Attach a Clamp-On Bail
Open the bail’s hinge with your fingers. Slip it over the necklace strand at your marked center point. Press the hinge closed until you hear a click. Give the pendant a gentle swing to test the grip.
If the bail slides, add a small crimp bead next to it. This stops the bail from drifting along the strand.
Wire Wrapping for a Custom and Durable Finish
Wire wrapping is the most secure method of all. It uses a length of thin wire to wrap around the pendant and the necklace strand. This creates a strong, artistic connection that won’t come loose.
We found that 24-gauge craft wire is the best thickness. It’s flexible enough to bend easily but strong enough to hold a pendant. You also need a pair of round-nose pliers for loops.
Simple Wire Wrap Technique for Beginners
Cut about 6 inches of wire. Slide the wire through the pendant’s bail. Center the pendant on the wire. Now bring both ends of the wire up and over the necklace strand.
Wrap each end around the strand three or four times. Trim any excess wire with flush cutters. Tuck the cut ends flat against the strand so they don’t poke your skin.
This method takes a little practice. We recommend trying it on a spare piece of cord first. Once you get the rhythm, it takes under two minutes per pendant.
When Wire Wrapping Is Worth the Effort
If your pendant is an heirloom or has sentimental value, wire wrapping is the safest option. It doesn’t rely on glue or pressure. The wire holds the pendant from multiple angles, so it won’t swing or twist.
You can also use wire wrapping to add a decorative touch. Colored wire or patterned wraps turn a simple pendant into a statement piece.
Preparing Your Necklace Before You Attach Anything
Check your necklace for weak spots before you add weight. We found that many beaded necklaces have loose crimps near the clasp. Give the entire strand a gentle tug to test its strength.
Look for frayed cord or stretched elastic. If you see any damage, fix it before attaching the pendant. Otherwise, the added weight could snap the strand.
Lay the necklace flat on a clean surface. Straighten any twisted beads. This ensures your pendant hangs evenly when worn.
Cleaning Your Pendant and Beads First
Dirt and oil can make it harder to slide jump rings through bead holes. Wipe your pendant with a soft cloth. Use a gentle jewelry cleaner if needed. Let everything dry completely before you start.
We found that a clean pendant also looks brighter once attached. It’s a small step that makes a big difference in the final look.
Testing the Pendant Before You Wear It
Hold the necklace up by its clasp. Let the pendant hang naturally. Check that it faces forward and doesn’t spin to the side. If it twists, the attachment point might be off-center.
Give the pendant a gentle shake. It should stay in place without wobbling. If it moves too much, tighten the crimp bead or add a second jump ring.
Wear the necklace for a few minutes at home. Look in a mirror and see how it drapes. Adjust the pendant position if it sits too high or too low on your chest.
Quick Checklist Before You Finish
- Pendant is centered and faces forward.
- Jump ring or bail is fully closed with no gaps.
- Crimp bead is snug but not crushed.
- No sharp wire ends poking out.
- Necklace strand shows no signs of stress.
- Pendant swings freely without catching on beads.
Run through this list every time. It takes ten seconds and prevents most common jewelry failures. We found that a quick check saves you from losing a favorite pendant mid-wear.
Troubleshooting Common Attachment Problems
Sometimes things go wrong. The pendant slides, the jump ring pops open, or the bead hole is too small. Don’t worry—each problem has a simple fix.
If the pendant slides along the strand, add a crimp bead on each side. If the jump ring keeps opening, switch to a thicker gauge ring. If the bead hole is too small, use a bail instead of a jump ring.
Fixing a Pendant That Faces Backward
This happens when the jump ring is attached at an angle. Open the ring and rotate the pendant 90 degrees. Re-close the ring and test again. Sometimes it takes a couple of tries to get the balance right.
Many experts say that a pendant with a flat back needs a bail to hang correctly. A jump ring can cause it to flip. A bail keeps the flat side against your chest.
What to Do If Your Bead Hole Is Too Small
You have two options. Ream the hole gently with a bead reamer tool. This widens the opening without cracking the bead. Or, skip the bead entirely and attach the pendant to the necklace’s chain or cord between beads.
We found that reaming works best on glass and ceramic beads. Avoid reaming soft stones like turquoise or opal—they can chip easily.
Matching Your Attachment Method to Your Necklace Style
Different necklaces call for different techniques. A delicate pearl strand needs a subtle bail. A chunky wooden bead necklace can handle a bold jump ring. Think about the overall look you want.
For a minimalist look, use a tiny jump ring that blends with the beads. For a statement piece, use a decorative bail or a wire wrap with contrasting color.
Stretchy Cord Necklaces
Stretchy cords need special care. Jump rings can cut into the elastic over time. We recommend using a glue-on bail or a wire wrap instead. These methods don’t put pressure on the cord.
If you must use a jump ring, place it between two beads rather than through a bead hole. This reduces stress on the elastic.
Wire and Chain Necklaces
Wire necklaces are the easiest to work with
Conclusion
Attaching a pendant to your beaded necklace is a simple DIY task you can finish in minutes. We covered four reliable methods, from quick jump rings to sturdy wire wraps. The right choice comes down to your pendant’s weight and your bead hole size.
Start with the easiest option first. Use a jump ring for light pendants and upgrade to a crimp bead or bail if you need extra hold. Always test your necklace before wearing it out. Give the pendant a gentle tug and check that it hangs straight.
Your jewelry should reflect your personal style. Grab your pliers, pick a method from this guide, and attach that pendant today. You’ll have a custom necklace ready to wear before you know it.
Frequently Asked Questions
Can I attach a pendant to a necklace without a jump ring?
Yes, you have several options. Use a glue-on bail for flat-backed pendants or a wire wrap for a secure hold. You can also thread the pendant directly onto the necklace wire if the bail hole is large enough.
Will a pendant damage my beaded necklace?
A lightweight pendant won’t cause damage if attached correctly. Heavy pendants can stress the strand over time. We recommend using a bail or wire wrap for anything over 15 grams to distribute the weight safely.
How do I keep my pendant from sliding around on the necklace?
Add a crimp bead on each side of the pendant to lock it in place. You can also use a small stop bead behind the pendant. Test the movement before finishing to make sure it stays centered.
What if my pendant is too heavy for a regular jump ring?
Switch to a thicker gauge jump ring or use a clamp-on bail instead. For very heavy pendants, wire wrapping is your best bet. It holds the pendant from multiple angles and won’t bend under pressure.
Can I use a pendant on a stretchy beaded bracelet or necklace?
Yes, but be careful with elastic cords. Jump rings can cut into stretchy material over time. We suggest using a glue-on bail or a wire wrap that doesn’t put pressure on the elastic.