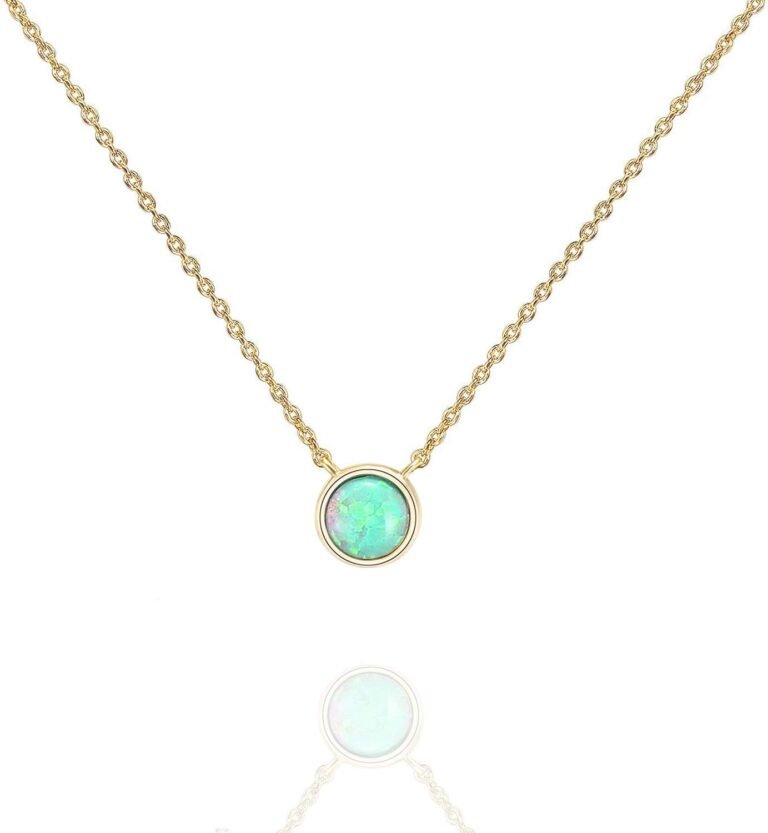
Wire-Wrapped Pendant Necklace Tutorial for Beginners
The easiest way to make a pendant necklace with wire is to use a simple wire-wrapping technique with a bead and a headpin. You loop the wire through the bead, create a wrapped loop at the top, and attach it to a chain. This beginner-friendly method takes just a few minutes and needs only basic tools like pliers and wire cutters.
We found that wire-wrapped pendants are one of the most popular DIY jewelry projects because they are affordable and fully customizable. You can use any bead, stone, or charm you love, and pair it with a chain you already own. The best part is that you don’t need a soldering iron or any fancy equipment to get a professional-looking result.
- You only need four supplies: wire, a bead, a chain, and two basic pliers.
- Start by threading your bead onto a headpin or a 3-inch piece of craft wire.
- Create a right-angle bend above the bead to form the base of your loop.
- Wrap the wire tail around the neck of the bead 3 to 4 times for a secure finish.
- Trim any excess wire and attach your finished pendant to a chain or cord.
Below, we break down every step in plain English, from choosing the right wire gauge to making a clean, tight wrap. Let’s walk through exactly how to make your first handmade pendant necklace, even if you’ve never picked up a pair of jewelry pliers before.
Making a Wire-Wrapped Pendant From Start to Finish
You don’t need a workshop full of tools to make a beautiful necklace. This project takes about ten minutes once you get the hang of the hand movements. We found that the wrapped loop technique is the backbone of most handmade jewelry, so learning it once opens the door to tons of other projects.
Before you cut any wire, lay out your supplies. You’ll need a bead with a hole large enough for your wire to pass through twice. You also need a chain or cord to hang it on. The process is forgiving, so relax and enjoy the tactile part of working with your hands.
Gathering the Right Supplies for Your Project
You can find all of these items at any craft store or online. We found that buying a small starter kit is a smart move if you are just testing the waters. It saves you from buying bulk wire you might not use.
Here is the short list of what goes into a simple wrapped pendant:
- 20 or 22 gauge craft wire (copper or silver-plated work best).
- One bead, stone, or glass charm with a hole.
- A chain, leather cord, or cotton twine.
- Round-nose pliers.
- Flush wire cutters.
- A jumping ring (optional, if your chain is too thick for the wire).
Many experts say that 20 gauge wire is the sweet spot for beginners. It is thick enough to hold its shape but thin enough to bend with simple hand pressure. Avoid using 24 gauge for this project, because it can snap when you pull the wraps tight.
Why the Wire Gauge Matters So Much
Wire gauge is just the thickness of the wire. A lower number means thicker wire. We found that mixing gauges can actually cause frustration, so stick with one spool for your first attempt.
Thicker wire (like 18 gauge) is harder to bend and hurts your fingers after a while. Thinner wire (like 24 gauge) is flimsy and won’t hold a heavy bead upright. The 20 gauge is the Goldilocks option for pendants.
Step-by-Step Wire Wrapping for a Pendant
This is the heart of the whole tutorial. Pay attention to the angles and pressure you use. You are essentially creating a tiny metal hook that holds your bead and attaches to your neckline.
Take a deep breath. The first loop you make will probably look a little crooked, and that is perfectly okay. Even seasoned makers redo their wraps to get them perfect.
Step 1: Cutting and Threading Your Wire
Cut a piece of wire about 3 inches long for a small bead. For a larger bead, go with 4 inches. Thread the wire through the bead so that you have about 1.5 inches sticking out from the top and the rest hanging below.
Hold the bead between your thumb and forefinger to keep it steady. You want the wire to sit snugly inside the bead hole but not scrape against the edges. If the bead is loose, the wrap will feel wobbly.
Step 2: Creating the Right-Angle Bend
This bend is the hinge for your loop. Use your flat-nose pliers to grasp the wire right above the bead. Then bend the short tail to a perfect 90-degree angle.
Think of it like making an uppercase “L” shape. The long wire goes down through the bead, and the short wire sticks out to the side. This angle is what allows your loop to sit perfectly centered on top of the bead.
Step 3: Shaping the Loop With Your Pliers
Switch to your round-nose pliers. Grip the wire right at the bend you just made. Now, roll the pliers toward the bead, pulling the short wire over the top of the pliers to form a circle.
You are basically wrapping the wire around the barrel of the pliers. The size of your loop depends on where you place the wire on the pliers. Closer to the tip creates a smaller loop, which is usually better for a pendant.
Step 4: Wrapping the Tail Around the Neck
Now you have a loop on top and a wire tail sticking out sideways. Hold the loop with your round-nose pliers to protect its shape. Then, use your fingers or a second pair of flat-nose pliers to wrap that tail around the wire stem right above the bead.
Wrap it 3 to 4 times, working downward toward the bead. Each wrap should sit tight against the previous one. We found that keeping consistent tension here makes the pendant look store-bought.
Troubleshooting a Messy Wrap
If your wraps are overlapping or leaving gaps, slow down. You can gently push the coils closer together with your pliers. If the wire kinks, simply unwind it and start that wrap again.
Practice on a spare piece of wire first if you feel nervous. This motion is the same one used in all kinds of jewelry clasps, so it’s worth drilling a few times.
Step 5: Trimming the Excess Wire
Once you have your 3 to 4 wraps, locate the tail end. Use your flush cutters to snip it as close to the wraps as possible. Be careful not to cut the wraps you just made.
After cutting, use the flat side of your pliers to press the cut end down. This is called “tucking” the wire. It prevents the sharp tip from snagging on your clothes or scratching your neck.
Step 6: Attaching Your Pendant to a Chain
Now comes the fun part. Open the loop you created by twisting it sideways with your pliers. Do not pull it open like a fishhook, because that will distort the circle.
Slide the loop onto your chain, then close it by twisting it back into place. Make sure the loop seam lines up neatly. If the chain is too thick to fit, use a small jumping ring as a connector.
Choosing the Perfect Bead and Chain Combo
Your bead is the star of the show, and the wire is just the supporting actor. We found that beads with a vertical hole placement (like a tube or cylinder) are easiest for beginners. Flat beads with horizontal holes require a different wrapping style.
As for the chain, think about weight. A heavy stone bead needs a sturdy chain. A light glass bead looks great on a delicate cable chain. The goal is balance, so your necklace hangs nicely without twisting.
Comparing Wire Types and Finishes
Your choice of wire finish changes the whole vibe of the necklace. Copper feels warm and bohemian. Silver-plated wire looks crisp and modern. Gold-filled wire is a bit pricier but resists tarnishing for years.
Here is a quick comparison to help you decide based on your style:
| Wire Type | Best For | Durability |
|---|---|---|
| Copper | Rustic, natural looks | Oxidizes over time |
| Silver-Plated | Everyday wear | Good, but can fade |
| Gold-Filled | Heirloom quality pieces | Very high |
| Stainless Steel | Allergies and active lifestyles | Excellent |
Many experts say that stainless steel is hypoallergenic, which aligns with guidelines from sources like the Mayo Clinic regarding metal sensitivity. If you have sensitive skin, skip the copper and silver-plated options.
Quick Checklist Before You Wear Your Necklace
You are almost done. Before you fasten that clasp and head out the door, run through this short checklist. It takes about thirty seconds and prevents embarrassing breakage later.
- Gently tug on the bead to ensure it doesn’t slide down the wire.
- Check that all wire ends are tucked flat against the wraps.
- Confirm the loop is fully closed with no visible gap.
- Test the clasp on your chain to make sure it snaps easily.
- Lay the necklace flat to see if the pendant hangs straight.
- Slide your finger over the wraps to feel for any sharp edges.
That is it. You have just made a custom piece of jewelry that costs a fraction of what you would pay in a boutique. The more you practice, the faster you will get, and soon you will be making matching sets for your friends. If you’re making a gift, our guide on how men can wear pendant necklaces covers chain length and style tips.
Keep your leftover wire scraps, by the way. Tiny pieces of wire are perfect for making small charms or earring hooks later on. Nothing goes to waste in this hobby. Now go show off your new skills and enjoy your handmade creation.
Conclusion
You now have everything you need to craft a beautiful wire-wrapped pendant necklace. We walked through choosing the right 20-gauge wire, threading your bead, and mastering the wrapped loop technique. The key is to keep your wraps tight and tuck those sharp wire ends flat.
Remember, your first attempt won’t be perfect, and that is completely fine. The best way to improve is to make another one right away. Grab a spare bead and a fresh piece of wire.
Practice the loop-and-wrap motion a few times, and you will be amazed at how quickly your hands learn the rhythm. Your custom necklace is ready to wear, and you are now equipped to make them for friends and family.
Frequently Asked Questions
What is the best wire for making a wire-wrapped pendant?
We recommend starting with 20-gauge copper wire because it is thick enough to hold its shape but easy to bend. It is also affordable, so you can practice without worrying about wasting expensive materials. You can switch to silver-plated or gold-filled once you feel confident.
How do you keep a bead from sliding on a wire necklace?
To keep your bead secure, you need to create a wrapped loop directly on top of it. The wraps around the wire stem act like a stopper, preventing the bead from slipping downward. Make sure those wraps sit snugly against the bead to lock everything in place.
Do you need a headpin to make a wire-wrapped pendant?
You can use a headpin, but a simple piece of craft wire works just as well. Using raw wire gives you more flexibility to adjust the length of the tail for your wraps. Headpins are convenient, but they can limit how many wraps you can fit above the bead.
Why does my wire keep breaking when I wrap it?
Wire breaks usually happen when you are using a gauge that is too thin, like 26-gauge, or when you bend the metal back and forth in the same spot. Try switching to 20-gauge wire and avoid overworking the same section. If you feel resistance, stop and reposition your pliers.
What type of chain is best for a wire-wrapped pendant?
A simple cable chain or a delicate curb chain works best for lightweight beads. If you are using a heavier stone, choose a chunkier chain that can support the weight. The goal is to make sure the pendant hangs flat and doesn’t pull the necklace out of shape.