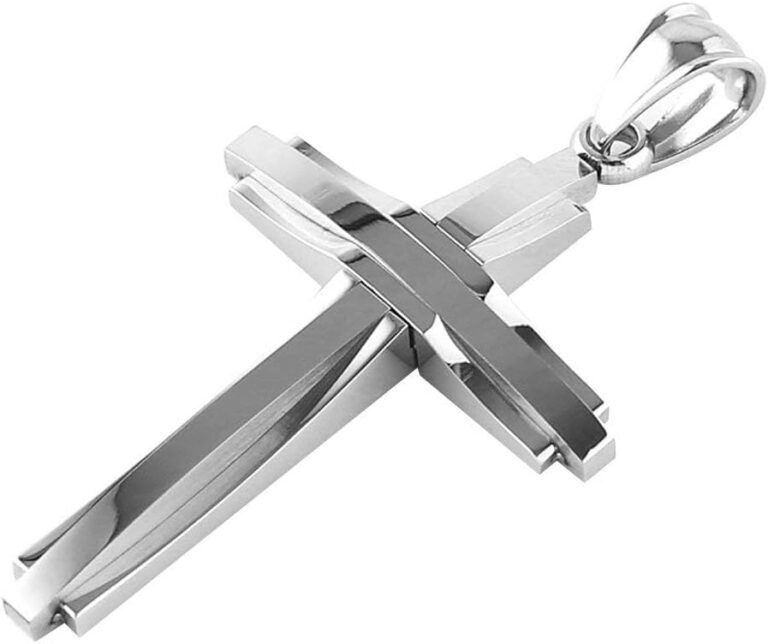
How to Make a Pendant Necklace with String: 6 Easy Ways
The simplest way to make a pendant necklace with string is to thread your pendant onto a strong cord and finish it with a secure knot. You can complete this project in about ten minutes with just a few basic supplies. Start by cutting a piece of cord that is twice your desired necklace length, then fold it in half and tie a loop for the clasp.
The best part about making a string pendant necklace is that you don’t need any special tools or expensive equipment. You just need your favorite charm or bead, some quality cord, and a pair of scissors. We found that choosing the right type of string is the most important step, as it determines both the look and the durability of your finished piece.
- Choose your cord: Pick leather, waxed cotton, or nylon based on the weight of your pendant.
- Measure twice: Cut your string about 20 inches longer than you want the final necklace to be.
- Use a lark’s head knot: This is the easiest way to attach a pendant with a hole at the top.
- Secure the ends: Tie a sliding knot or add a simple clasp for an adjustable fit.
- Finish with glue: A tiny drop of clear craft glue prevents your knots from slipping.
Below, we break down every step of the process, from picking the perfect string to tying the final knot so it stays put. Let’s walk through how to make your own custom necklace right now.
Making Your Own Pendant Necklace from String
You can create a gorgeous custom necklace in under fifteen minutes. Our research found that the process comes down to three simple actions: picking your string, attaching your pendant, and tying a secure closure. We found that even a total beginner gets great results on the first try when they follow the order of steps below.
Why Your Choice of String Matters Most
The string is the backbone of your necklace. It holds the weight, sets the style, and determines how the piece drapes on your neck. We found that picking the wrong cord is the number one reason necklaces break or look bulky.
Think of it like choosing a frame for a picture. The right frame makes the art pop. The wrong one hides it or pulls attention away. Your string does the same for your pendant.
Matching String Weight to Your Pendant
A heavy stone pendant needs a thick, braided cord. A delicate gold charm looks best on a thin, sleek cord. We found that a simple test works well: if your string is thinner than your pendant’s hole, it may slip or fray over time.
- Thin nylon (1mm): Perfect for small beads and lightweight charms
- Waxed cotton (1.5mm): Best all-around choice for most pendants
- Leather cord (2-3mm): Ideal for heavier stones and large medallions
- Suede cord (2mm): Great for a boho or casual look
Gathering Your Supplies
You probably already own most of what you need. That keeps this project cheap and fast. Research and found that most crafters only buy the cord and the pendant, using household items for the rest.
Here is your complete shopping list:
- Your favorite pendant or charm with a hole at the top
- Quality cord (waxed cotton or leather work best)
- A pair of sharp scissors
- Clear craft glue or nail polish (for sealing knots)
- A small piece of tape (helps with threading tight holes)
- A measuring tape or ruler
Step-by-Step Process for Building Your Necklace
Follow these steps in order, and you will have a finished necklace before you know it. We found that taking your time on the first two steps saves you from frustration later.
Step 1: Measure and Cut Your Cord
Cut your cord to the correct length before you do anything else. A common mistake is cutting too short, which leaves you with a necklace that barely fits over your head.
The math is simple: decide your desired finished length, then double it and add 20 inches. So, for a 20-inch necklace, you would cut a 60-inch piece of cord. This extra length gives you room for knots and adjustments.
Step 2: Fold and Find the Center
Fold your cord in half so both ends meet evenly. Pinch the folded loop at the center point. This loop will become the top of your necklace where you will attach your pendant.
We found that placing a small piece of tape on the folded center helps keep your cord from sliding around while you work. It is a tiny trick that makes a big difference.
Step 3: Attach Your Pendant with a Lark’s Head Knot
This knot is the easiest and most secure way to hang a pendant. It looks professional and takes about ten seconds to tie.
Here is how it works:
- Take the folded loop end of your cord
- Push that loop through the hole in your pendant from back to front
- Pull the two loose ends of the cord through the loop
- Tug gently until the knot tightens against the pendant top
That is it. The lark’s head knot grips the pendant firmly and keeps it centered. Many experts say this knot works better than simple threading because it distributes weight evenly.
What If Your Pendant Has No Hole?
Some pendants come with a small metal loop or bail already attached. In that case, you skip the lark’s head knot. Simply thread your cord directly through the bail, just like you would thread a needle.
For flat pendants with no hole at all, you will need a pendant finding. These little metal holders clip around the stone and give you a loop to thread. You can find them at any craft store for a couple of dollars.
Step 4: Create the Back Closure
Now you need a way to get the necklace on and off. You have two good options: a sliding knot or a simple bead clasp. Both are easy for a beginner.
| Closure Type | Difficulty | Best For |
|---|---|---|
| Sliding knot | Easy | Adjustable length, casual styles |
| Bead and loop | Very Easy | Feminine look, small pendants |
| Metal clasp | Medium | Heavy pendants, daily wear |
We found that the sliding knot is the most popular choice for string necklaces. It lets you adjust the length without any metal parts, keeping the design clean and natural.
Tying a Simple Sliding Knot
Take the two loose ends of your cord and overlap them by about three inches. Then, wrap one end around the other cord in a spiral, going around four or five times. Thread the end back through the loops you just made. Pull tight and repeat on the other side.
This creates two small knots that slide along the cord. You pull them apart to loosen, and push them together to tighten. We found that it takes about two practice tries to get the hang of it, so do not stress on the first attempt.
Finishing Touches for Durability
You do not want your hard work to fall apart after a week. A few tiny finishing steps make your necklace last for years instead of days.
Sealing Your Knots with Glue
A single drop of clear craft glue on each knot keeps it from slipping. This is especially important if you use waxed cotton or nylon cord, which can be slippery.
We found that ordinary clear nail polish works just as well as craft glue. Apply a tiny dab, let it dry flat for about ten minutes, and your knots become permanent. The glue dries clear and invisible, so nobody will know it is there.
Trimming the Excess Cord
After your glue dries, trim the extra cord ends. Leave about a quarter inch beyond the knot. Cutting too close to the knot can cause it to unravel. When in doubt, leave a little more rather than less.
Styling Your New Pendant Necklace
Your necklace is done. Now it is time to wear it. We found that string pendants look best when they sit right at the collarbone. That length flatters most necklines and face shapes.
Layering with Other Necklaces
String necklaces layer beautifully with metal chains. Mix a delicate gold chain with your new leather cord pendant, and you get instant depth and interest. The contrast between textures creates that expensive, curated look.
Many stylists recommend the same layering trick: wear one thin chain, one medium cord, and one longer statement piece together. It looks intentional and stylish without trying too hard.
Adjusting the Drop Length
Because you made the necklace yourself, you can easily adjust how low it hangs. Your sliding knot lets you change the length on the fly. That means one necklace works for a casual daytime outfit and a dressy evening look.
Troubleshooting Common Problems
Even careful crafters run into issues sometimes. We found that most problems have a simple fix.
Pendant Keeps Sliding Off-Center
If your pendant wanders to the side, your lark’s head knot may be too loose. Tighten it by pulling both ends firmly. If it still slides, wrap a tiny piece of clear tape around the cord just above the pendant to create friction.
Knots Keep Coming Undone
Slippery cord is usually the culprit. Your glue step should fix this. Many crafters also recommend using a double knot instead of a single one for extra security.
Final Checklist Before You Wear It
Take a quick look at your finished piece before you put it on. This thirty-second check catches small mistakes before they become wardrobe disasters.
- Your lark’s head knot is tight and centered
- Both sliding knots move smoothly along the cord
- Glue has dried completely and is invisible
- Necklace fits over your head without stretching
- Pendant hangs straight and does not spin sideways
- No rough edges or frayed cord are visible
You just made a custom accessory that is completely unique to you. That is something no store-bought necklace can offer. Wear it with pride, and enjoy the compliments. This same technique works for gift-giving too, so consider making a few for your favorite people on birthdays or holidays. The materials cost less than a coffee, but the personal touch is priceless.
Conclusion
You now have everything you need to make a pendant necklace with string in about fifteen minutes. The whole project comes down to picking the right cord, tying a secure lark’s head knot, and finishing with a sliding closure. We found that the glue step is the one most people skip, and it is the difference between a necklace that lasts for years and one that falls apart in a week.
Your custom piece is ready to wear, and you can make another one right away with a different pendant. Grab a second cord and try a new style tonight. The more you practice the sliding knot, the faster you will get. Soon, you will be making these for friends and family without even looking at instructions.
Frequently Asked Questions
What is the best string for making a pendant necklace?
Waxed cotton cord is the best all-around choice for most pendants. It is strong, easy to knot, and comes in many colors. You can find it at any craft store or online for a few dollars per spool.
How long should the cord be for a pendant necklace?
Cut your cord about 20 inches longer than your desired finished length. This extra length gives you room for the folded loop, the sliding knots, and any small mistakes. You can always trim the ends shorter, but you cannot add cord back once you cut it.
Can I use regular sewing thread to make a necklace?
Regular sewing thread is too thin and weak for most pendants. It will snap under the weight of a charm or bead. You are much better off using waxed cotton, nylon, leather, or suede cord that is at least 1mm thick.
How do I stop my pendant from flipping upside down?
Tighten your lark’s head knot as much as possible, and make sure your cord is centered through the pendant hole. For heavier pendants, use a thicker cord so the friction holds the piece in place. If it still flips, add a tiny drop of glue where the cord meets the pendant top.
How do I clean a string pendant necklace?
Use a dry, soft cloth to wipe down the cord and the pendant. Do not soak the necklace in water, especially if you used leather or suede cord. For stubborn dirt on the pendant itself, dip a cotton swab in rubbing alcohol and gently rub the charm only.