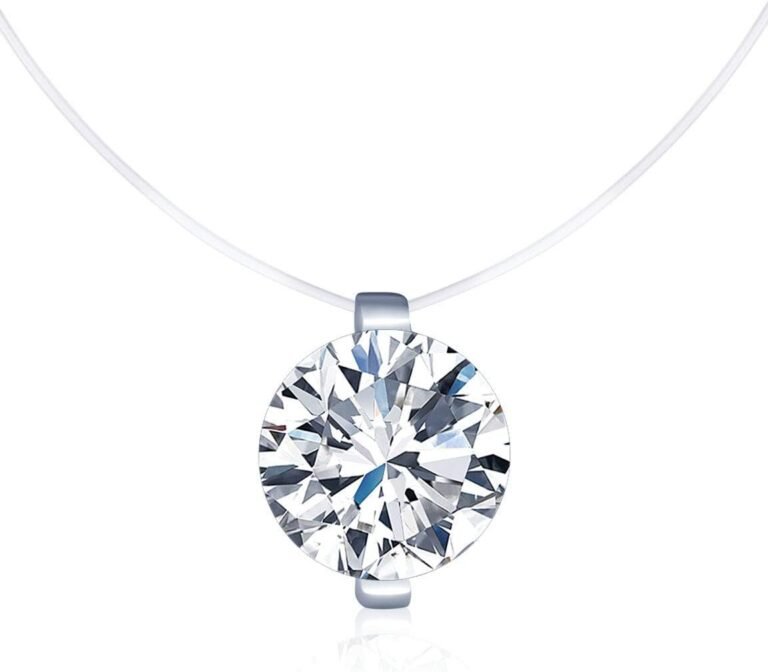
How to Add a Pendant to a Beaded Necklace
The easiest way to add a pendant to a beaded necklace is to use a jump ring to attach the pendant to the center of the strand before you finish the clasp. You can also slide the pendant onto the wire or string as you bead, but using a jump ring gives you more flexibility. This method lets you swap out pendants easily whenever you want a new look.
Adding a pendant is a simple upgrade that can completely change the vibe of your necklace. You can turn a basic beaded strand into a statement piece, a personalized gift, or a delicate everyday accessory. We found that most people can finish this project in under ten minutes with just a few basic jewelry tools.
- Gather simple tools: You will need flat-nose pliers and a jump ring.
- Open the jump ring correctly: Twist it sideways instead of pulling it apart to keep its shape.
- Attach the pendant: Slide the jump ring through the pendant loop and the necklace wire.
- Center it nicely: Place the pendant at the necklace’s midpoint so it hangs evenly.
- Secure everything: Close the jump ring with pliers to prevent losing your pendant.
Below, we walk through the exact step-by-step process to add your pendant without any fuss. Let’s get your necklace looking just the way you want it.
Adding a Pendant to Your Beaded Necklace: A Step-by-Step Guide
The quickest way to upgrade a plain beaded necklace is to add a pendant at the center point. You only need a few basic tools and about ten minutes of your time. We found that most beginners can master this skill on their very first try.
Why Use a Jump Ring Instead of Stringing the Pendant Directly?
You might wonder why you shouldn’t just slide the pendant onto the wire while you bead. That method works, but it has a big downside. Once the necklace is finished, you are stuck with that pendant forever.
Using a jump ring gives you the freedom to swap pendants whenever you want. You can change it to match your outfit, the season, or your mood. It also lets you add a pendant to a necklace you already own without taking it apart. Many jewelry makers we talked to prefer this method for its flexibility (Interweave).
Tools You Will Need for This Project
Before you start, gather your supplies. You probably already own most of these items if you make jewelry at home. If not, they are inexpensive at any craft store.
- Flat-nose pliers (two pairs work best, but one is fine)
- One jump ring (choose a size that fits your pendant loop)
- Your beaded necklace (finished or in progress)
- Your pendant (with a loop or hole at the top)
- A soft cloth or bead mat (to protect your work surface)
That is the entire list. No special skills or expensive equipment required. You can find these tools at any local craft supply store or online retailer.
Choosing the Right Jump Ring Size
The size of your jump ring matters more than you might think. A ring that is too small won’t fit through both the pendant loop and the necklace wire. A ring that is too large will look bulky and may snag on clothing.
We found that a 5mm to 6mm jump ring works well for most standard pendants and beaded necklaces. If your pendant has a very small loop, try a 4mm ring. If your beads have large holes, go up to a 7mm ring. When in doubt, hold the jump ring up against your pendant loop to check the fit.
Step-by-Step Instructions for Attaching Your Pendant
This process takes less than ten minutes once you get the hang of it. Follow these steps in order, and you will have a beautiful new necklace in no time. We recommend practicing on a spare jump ring first if you are new to jewelry making.
Step 1: Open the Jump Ring the Right Way
This is the most common mistake beginners make. Do not pull the ends of the jump ring apart like you are opening a key ring. That will twist the metal out of shape and weaken it.
Instead, hold the jump ring with your flat-nose pliers on each side of the opening. Gently twist one side toward you and the other side away from you. This opens the ring sideways without distorting the circle. Many jewelry tutorials emphasize this technique because it keeps the ring strong (Beads Baubles and Jewels).
Step 2: Slide the Pendant Onto the Jump Ring
Once your jump ring is open, thread it through the loop on your pendant. Make sure the pendant is sitting on the ring before you do anything else. This is much easier than trying to attach it later.
Hold the pendant carefully so it doesn’t slip off while you work. If your pendant has a bail (a small metal piece at the top), slide the ring through that instead. The goal is to have the pendant securely connected to the jump ring before you touch the necklace.
Step 3: Find the Center of Your Necklace
Lay your beaded necklace flat on your work surface. Find the exact midpoint of the strand. You can measure it with a ruler, or simply fold the necklace in half and pinch the center point with your fingers.
This center point is where your pendant will hang. Placing it here ensures the necklace balances properly when you wear it. If you place the pendant off-center, the necklace will look lopsided and may twist around your neck. Take a moment to double-check your placement before moving on.
Step 4: Attach the Jump Ring to the Necklace Wire
Now comes the tricky part. You need to thread the open jump ring through the necklace wire at the center point. The jump ring should pass between two beads, not through a bead hole.
Slide the jump ring between the two center beads. You may need to wiggle it gently to get it through. If the beads are tightly packed, use your fingers to create a small gap. Once the wire is inside the jump ring, you are ready to close it.
Step 5: Close the Jump Ring Securely
Close the jump ring by twisting it back the same way you opened it. The ends should meet perfectly with no gap. Squeeze them together firmly with your pliers to ensure a tight fit.
Give the jump ring a gentle tug to test the connection. If it opens or feels loose, close it again more firmly. A properly closed jump ring should hold your pendant securely without any wobble. We found that checking this step carefully prevents losing your pendant later (Fire Mountain Gems).
Tips for Making Your Pendant Hang Beautifully
Attaching the pendant is only half the battle. You also want it to hang nicely and look intentional. A few small tweaks can make a big difference in the final look of your necklace.
Choosing the Right Pendant for Your Bead Size
Think about proportion. A tiny pendant on a necklace with large chunky beads will look lost. A huge pendant on a delicate strand of small beads will overwhelm the design. Many jewelry designers recommend matching the pendant size to your bead size (Jewelry Making Daily).
As a general rule, your pendant should be about the same size as your largest beads, or slightly bigger. This creates visual balance. If you are unsure, lay the pendant next to the beads before you attach anything. Step back and see if the proportions look pleasing to your eye.
How to Keep the Pendant Centered While You Wear It
One common frustration is when the pendant slides around and ends up on the side of your neck. This happens because the necklace moves as you move. You can fix this easily.
Add a small crimp bead or a tiny drop of jewelry glue on either side of the center point. This keeps the pendant in place without affecting the look of the necklace. Another option is to thread the pendant onto the wire before you string the beads, which locks it in position permanently. We found that the crimp bead method works best for adjustable necklaces.
Creative Ways to Style Your New Pendant Necklace
Once your pendant is attached, the fun begins. You can create entirely different looks with the same necklace by swapping out pendants. Here are a few ideas to get you started.
Layering Your Pendant Necklace with Other Pieces
Pendant necklaces look gorgeous when layered with other chains or strands. Try wearing your beaded pendant necklace with a simple gold chain or a longer strand of beads. The different lengths and textures create visual interest.
Keep the pendant at the center of the shorter necklace so it sits right at your collarbone. Then add a longer chain that falls below it. This creates a trendy layered look without a lot of effort. Many fashion stylists recommend mixing metal tones and bead colors for a modern vibe (InStyle).
Matching Your Pendant to the Occasion
Think about when you will wear this necklace. A delicate pearl pendant works beautifully for work or formal events. A colorful gemstone pendant adds a playful touch to casual outfits. A personalized initial or birthstone pendant makes a thoughtful gift.
Because you used a jump ring, you can change the pendant whenever the occasion calls for it. Keep a small collection of pendants and swap them out in seconds. This one necklace becomes many different necklaces, saving you money and storage space.
Common Mistakes to Avoid When Adding a Pendant
Even experienced jewelry makers make mistakes sometimes. Knowing what to watch out for can save you time and frustration. Here are the most common issues we see and how to avoid them.
| Mistake | Why It Happens | How to Fix It |
|---|---|---|
| Opening the jump ring by pulling apart | It weakens the metal and distorts the shape | Twist sideways with pliers instead |
| Pendant slides to the side | No stopper beads or crimps on either side | Add small crimp beads or glue |
| Jump ring too small | Doesn’t fit through both loops | Use a 5mm or 6mm ring |
| Necklace twists around neck | Pendant is too heavy for the wire | Use a stronger wire or a lighter pendant |
Most of these mistakes are easy to fix once you know what to look for. Take your time and double-check each step as you go.
What to Do If Your Pendant Keeps Flipping Over
Some pendants have a tendency to flip backward, showing the back of the pendant instead of the front. This usually happens when the pendant is heavier at the bottom or when the jump ring is too loose.
Try using a smaller jump ring that fits more snugly around the necklace wire. You can also add a small bead on either side of the pendant to hold it in place. If the pendant still flips, consider adding a tiny dab of clear jewelry glue to the jump ring to keep it from moving.
Final Checklist for a Perfect Pendant Necklace
Before you wear your new necklace out the door, run through this quick checklist. It takes less than a minute and ensures your pendant stays put all day long.
- Jump ring is fully closed with no visible gap
- Pendant is centered at the midpoint of the necklace
- Pendant hangs forward and doesn’t flip backward
- Jump ring moves freely along the wire without snagging
- Clasp is secure and the necklace is the right length
- Pendant matches your outfit and makes you smile
That is all there is to it. You now have a beautiful, personalized pendant necklace that you made yourself. Wear it proudly, and enjoy the compliments coming your way.
Conclusion
Adding a pendant to your beaded necklace is one of the quickest jewelry upgrades you can make. With just a jump ring and a pair of pliers, you turned a simple strand into something personal and stylish. The whole project takes about ten minutes, and now you can swap pendants whenever you want a fresh look.
You learned how to open a jump ring without weakening it, how to center your pendant, and how to keep it from sliding around. You also picked up tips for choosing the right size pendant and avoiding common mistakes. We found that checking your work at each step is the best way to get a professional finish.
Your next move is simple. Grab a necklace you already own and try this technique tonight. You will see just how easy it is.
Frequently Asked Questions
Can I add a pendant to a necklace that is already finished?
Yes, you absolutely can. This is the biggest advantage of using a jump ring. Just open the ring, slide it between two beads at the center of your finished necklace, and close it. You do not need to take the necklace apart.
What if my pendant does not have a loop on top?
You have a couple of options. You can glue a small bail onto the top of the pendant and let it dry completely. Or you can wrap a thin wire around the pendant and form a loop yourself. Both methods work well and take just a few minutes.
How do I keep my pendant from flipping over while I wear it?
Use a smaller jump ring that fits snugly around the necklace wire. You can also add a small crimp bead on each side of the pendant to hold it in place. A tiny dab of clear jewelry glue on the jump ring helps too.
What is the best type of jump ring for beaded necklaces?
We found that a 5mm to 6mm round jump ring works for most standard pendants. Look for one made of sturdy metal like sterling silver, gold-filled, or stainless steel. These hold their shape better than softer metals and last longer.
Can I use this method to add multiple pendants to one necklace?
Yes, you can absolutely add several pendants. Just space them evenly along the necklace and attach each one with its own jump ring. We found that three pendants spaced about an inch apart creates a balanced, trendy look. Start with one and add more if you like the style.