DIY Ring Making: A Beginner’s Guide
You can absolutely make your own ring at home! With some basic tools and materials, you can craft a unique piece of jewelry that’s perfect for you or someone special. It’s a really rewarding process, and you don’t need to be a professional jeweler to get started making a simple ring.
Making a ring yourself opens up a world of creativity. You can choose the exact metal, design, and size you want. Many people discover they love the hands-on nature of jewelry making and find it a relaxing hobby. Plus, a handmade ring carries a special kind of sentiment.
- Gather your tools and materials.
- Choose a simple ring design to start.
- Measure your finger accurately for the right fit.
- Consider beginner-friendly metals like copper or brass.
- Practice basic shaping and finishing techniques.
Ready to get your hands a little crafty? Let’s walk through the steps to making your very own ring, from picking your materials to the final polish.
“`htmlCrafting Your Own Ring at Home
You’re ready to dive into making your very own ring! It’s a fantastic way to create something truly personal. We’ll guide you through the process, from picking the right materials to getting that satisfying final shine. Don’t worry if you’ve never done this before; we’ll keep it simple.
Choosing Your Ring’s Foundation: Metals and Materials
The first big decision is what your ring will be made of. For beginners, it’s wise to start with metals that are easier to work with and less expensive. This lets you practice without a huge investment.
Beginner-Friendly Metal Options
When we looked into beginner metals, a few stood out. Copper is a great starting point. It’s soft enough to bend and shape easily, and it’s also quite affordable. You can find copper wire in various gauges. Brass is another excellent choice. It’s a bit harder than copper, offering a slightly different feel as you work. Plus, brass has a lovely golden hue that many people enjoy. Many jewelry makers suggest these for their first few projects.
While precious metals like silver and gold are beautiful, they can be more challenging for newcomers. They are also much more expensive. It’s best to save those for when you’ve gained some experience. Think of copper and brass as your training wheels.
Tools You’ll Need to Get Started
To make a basic ring, you won’t need a whole workshop. A few key tools will get you going. A set of round-nose pliers is essential for shaping curves. Needle-nose pliers are also very handy for gripping and bending. You’ll definitely want a metal file for smoothing rough edges and shaping your ring band. A small hammer or a rawhide mallet can be useful for flattening or shaping. Lastly, a ring mandrel or a cylindrical object (like a marker or a dowel) will help you get the correct size and shape.
Many people find that they already have some of these basic tools around the house. If not, you can usually find beginner jewelry-making kits that include most of what you’ll need.
Designing Your First Ring: Simplicity is Key
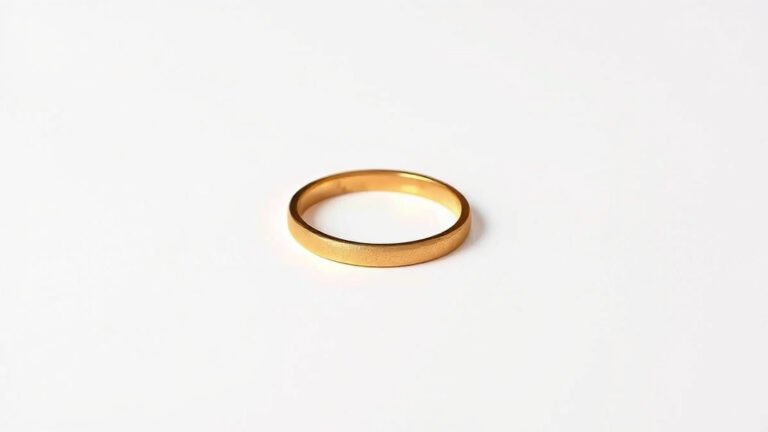
For your very first ring, we recommend keeping the design as simple as possible. Think of a basic band or a slightly twisted design. Complex shapes, soldering, or stone setting can wait until you’re more comfortable with the materials and tools.
Measuring for the Perfect Fit
Getting the right size is super important. A ring that doesn’t fit is just no fun at all! You can measure your finger in a couple of ways. The easiest method is to use a ring sizer. These are small plastic rings you can try on to find your perfect fit. If you don’t have one, you can use a strip of paper or string.
Wrap the paper or string snugly around the base of your finger. Mark where the end of the paper or string meets. Then, measure the length of the marked section in millimeters. You can then compare this measurement to a ring size chart, which is readily available online. Many sources, like the Gemological Institute of America (GIA), offer these charts.
Remember that your finger size can change slightly depending on the temperature. Your fingers are usually a bit larger when they are warm. Try to measure when your hands are at a comfortable, normal temperature.
Step-by-Step: Building Your Ring
Now, let’s get to the fun part – actually making the ring! We’ll focus on a simple wire-wrapped ring as an example, as it’s very forgiving for beginners.
Preparing Your Metal Wire
Start by cutting a length of your chosen metal wire. The length you need will depend on the thickness of the wire and the desired size of your ring. A good starting point for a medium-sized ring band is about 6 to 8 inches of 16-gauge wire. It’s always better to have a little extra wire than not enough.
Shaping the Band
Take your wire and begin to bend it around your ring mandrel or cylindrical object. You want to create a loop that will form the band of your ring. Use your round-nose pliers to help guide the wire into a smooth curve. You’re essentially creating a basic circle. Don’t worry if it’s not perfectly round at first; you can adjust it.
If you’re making a simple twisted ring, you might cut two pieces of wire. You’ll then twist them together to form the band. This can create a nice texture and visual interest.
Securing the Ends and Adding Embellishments (Optional)
Once you have your band shaped, you need to secure the ends. You can do this by wrapping the excess wire around the band itself, creating a neat finish. Use your pliers to tuck in any sharp points. If you want to add a simple embellishment, you could wrap a thinner wire around the band at certain points, or create small loops at the ends of the band before securing them.
Some designs might involve coiling the wire ends to create decorative “beads” or “knots.” This is where you can start to get a little creative once you’re comfortable with the basic shaping.
Finishing and Polishing Your Ring
This is where your ring really starts to shine! Use your metal file to smooth out any rough edges or sharp spots. You want the inside of the ring band to be smooth against your finger. Then, you can use a polishing cloth specifically designed for metals. This will remove any tarnish and give your ring a beautiful gleam. For copper and brass, you might need a bit more elbow grease than with softer metals.
Many sources, like the American Craft Council, suggest starting with coarser files and then moving to finer grits for a truly smooth finish.

A Quick Checklist for Your Ring-Making Journey
Here’s a handy checklist to keep you on track:
- Gather all necessary tools and materials before you begin.
- Select a simple ring design for your first attempt.
- Measure your finger accurately using a sizer or string method.
- Choose beginner-friendly metals like copper or brass.
- Work slowly and use your pliers and files to shape and smooth.
- Admire your finished, handmade ring!
Troubleshooting Common Ring-Making Issues
Even with the best intentions, things can go a bit awry. It’s normal! One common problem is the ring band being too loose or too tight after shaping. If it’s too loose, you can try gently squeezing it with your pliers to tighten it. If it’s too tight, you might need to carefully unbend it slightly and re-shape. Another issue can be uneven shaping. Don’t be afraid to adjust and re-shape until you’re happy.
Wire that snaps can happen if you bend it back and forth too many times. Try to make your bends with smooth, deliberate movements. If you get a sharp end, always file it down until it’s completely smooth. Safety first!
“`Conclusion
You’ve learned that making your own ring at home is totally achievable! We’ve walked through selecting beginner-friendly metals like copper and brass, choosing simple designs, and the essential tools you’ll need. Remember, practice is key. Your first ring might be a learning experience, and that’s perfectly fine. The most important part is enjoying the creative process and the satisfaction of wearing or gifting something you made with your own hands. Ready to give it a try? Grab some wire and pliers, and start shaping your unique piece today!
Frequently Asked Questions
What’s the easiest metal to start making rings with?
Copper wire is generally considered the easiest metal for beginners to start with. It’s soft enough to bend and shape easily without too much effort, making it forgiving for your first few projects. It’s also quite affordable, so you can practice without a big investment.
How do I know what ring size to make?
Accurate measurement is key! You can use a plastic ring sizer for the most precise fit. Alternatively, wrap a piece of paper or string snugly around your finger, mark where it overlaps, and measure the length in millimeters. You can then consult a ring size chart online to find your corresponding size.
Can I make a ring without special jewelry tools?
For a very basic wire ring, you can get started with common household items. Pliers (like needle-nose or combination pliers) can help with bending. A cylindrical object like a marker or dowel can serve as a makeshift ring mandrel. A metal file, even a coarse one from a hardware store, is essential for smoothing edges.
How do I make sure my handmade ring doesn’t have sharp edges?
Always use a metal file to smooth down any rough spots or sharp ends. Pay special attention to the inside of the ring band where it will touch your skin. You can also use pliers to carefully tuck in any wire ends to make them less noticeable and less likely to snag.
Is it possible to add decorations to a simple ring band?
Yes, absolutely! Once you’ve mastered the basic band, you can add simple embellishments. Try wrapping a thinner wire around the band, creating small decorative coils at the ends, or even twisting two wires together for a textured look. These small additions can make your ring truly unique.