Design a Custom Pendant: A Beginner’s Guide
The easiest way to design a necklace pendant is to start with a clear sketch or a single inspiration word. You don’t need expensive tools or a degree in art to make something you’ll love. Designing a necklace pendant comes down to choosing a shape, picking your materials, and planning the size so it hangs beautifully.
You get to play with personal meaning, metal types, and gemstones. We found that most people worry about making their pendant look “professional,” but simple designs often wear the best. Your pendant should reflect your style and feel comfortable for daily wear, not just look good in a photo.
- Start simple: Pick one focal shape, like a circle, teardrop, or letter.
- Match your metal: Choose silver, gold, or bronze based on your skin tone and wardrobe.
- Mind the size: Keep it between 16mm and 25mm for everyday comfort.
- Plan the hole: Decide where the jump ring goes so the pendant hangs straight.
- Protect the finish: Add a clear coat or use tarnish-resistant metals for longevity.
Below, we walk you through the exact steps to turn your idea into a wearable piece, from sketching to final polish. Let’s get started.
Starting Your Pendant Design with a Clear Direction
Before you touch any tools, you need a plan. We found that the best pendant designs start with a single, clear idea. This keeps you from feeling overwhelmed by all the choices out there.
Think about the story you want to tell. Is this a gift for a friend who loves the ocean? A personal symbol of strength? A fun accessory for a night out? Your answer shapes every choice you make next.
Gathering Visual Inspiration the Smart Way
You don’t need to be an artist to gather great ideas. Start a simple folder on your phone. Save screenshots of pendants you like, even if they aren’t exactly your style. Notice what catches your eye first. Is it the shape, the color, or the texture?
Research and found that mood boards help people make faster decisions. A quick Pinterest board or even a physical collage works wonders. The goal is to spot a pattern in what you love. Maybe you always pick geometric shapes. Or perhaps you lean toward organic, nature-inspired forms. That pattern becomes your design foundation.
Choosing Your Focal Point or Symbol
Your focal point is the heart of your pendant. It’s the main shape people notice first. Common choices are circles, teardrops, leaves, and initials. We suggest picking just one. A single, bold shape often looks more polished than a busy cluster of symbols.
If you want to combine elements, try stacking them in a balanced way. For example, a small gemstone set inside a simple circle. That keeps the eye moving without feeling chaotic.
Designing the Pendant’s Shape and Size
Now it’s time to get specific about the physical form. The shape and size of your pendant will determine how it feels on your neck. A well-proportioned piece looks intentional and comfortable.
Consider your body type and the neckline of your clothes. A long, vertical pendant can make the neck look longer. A wide, round pendant suits a more casual look. Many experts say that proportion is the secret to a professional finish.
Picking a Size That Works for Daily Wear
Size matters more than you might think. We recommend a pendant between 16mm and 25mm for everyday comfort. That’s about the size of a US quarter or a large pea. This range sits nicely without feeling heavy or getting in the way.
For a statement piece, you can go bigger, up to 40mm. But be mindful of weight. A heavy pendant can pull on the chain and cause discomfort over time. Many guidelines point to weight as a key factor for wearability (Mayo Clinic).
Planning the Pendant Hole and Bail Placement
The hole, or bail, is where your chain passes through. Its placement decides how the pendant hangs. If you put the hole right at the top, the piece will hang straight down. This works for most shapes like circles and ovals.
For asymmetrical designs, you may want the hole off-center. This creates a stylish, tilted look. Just test it with a paper template first. Trace your shape, cut it out, and poke a hole where you think it goes. Hold it up to a string to see how it drapes.
Selecting Materials for Your Pendant
Your material choice affects the look, durability, and cost of your piece. There’s no wrong answer here, but some materials suit certain styles better. Let’s break down the main options so you can choose with confidence.
Comparing Metal Options: Gold, Silver, and Bronze
Metals set the tone for your pendant. Sterling silver offers a bright, cool shine that pairs well with almost any outfit. Gold brings warmth and a classic feel. Bronze has a rustic, earthy vibe that ages beautifully over time.
Consider your skin tone and wardrobe. Silver often looks striking on cool-toned skin. Gold complements warm undertones. And bronze adds a bohemian touch that stands out. You can also choose hypoallergenic options like surgical steel or titanium if you have sensitive skin.
| Metal | Look | Best For | Care Level |
|---|---|---|---|
| Sterling Silver | Bright, cool shine | Everyday wear | Polish occasionally |
| Gold (10k-14k) | Warm, classic | Heirloom pieces | Minimal upkeep |
| Bronze | Rustic, earthy | Artisan styles | May tarnish over time |
| Surgical Steel | Modern, sleek | Sensitive skin | Very low maintenance |
Incorporating Gemstones and Natural Elements
Gemstones add color, meaning, and texture to your pendant. You can use a single polished stone or a cluster of tiny chips. Birthstones are a popular choice because they carry personal meaning. Clear quartz works well because it goes with everything.
Natural elements like wood, shell, or resin can give your pendant a unique character. We found that mixing materials, like a wood slice with a silver bail, creates a trendy, handcrafted look. Just make sure to seal porous materials to protect them from moisture.
Creating Your Design Sketch and Template
You don’t need fancy drafting skills to sketch your idea. A simple pencil drawing on paper is enough to get started. Focus on the outline and the placement of the hole. This sketch becomes your roadmap for the build.
Once you have a sketch, turn it into a template. Use sturdy cardboard or craft foam. Cut out your shape and hold it against your collarbone. This quick test shows you the real-world size and feel before you commit to expensive materials.
Testing Proportions with a Paper Prototype
A paper prototype is a game-changer. Cut your shape out of cardstock and attach it to a piece of string. Wear it around the house for an hour. You’ll quickly notice if the pendant is too big, too small, or hangs awkwardly.
This step saves you from wasting silver or gold on a mistake. Many designers we talked to swear by this practice. It lets you experiment with different shapes and sizes without any risk. Tweak your paper model until it feels just right.
Refining the Edges and Surface Texture
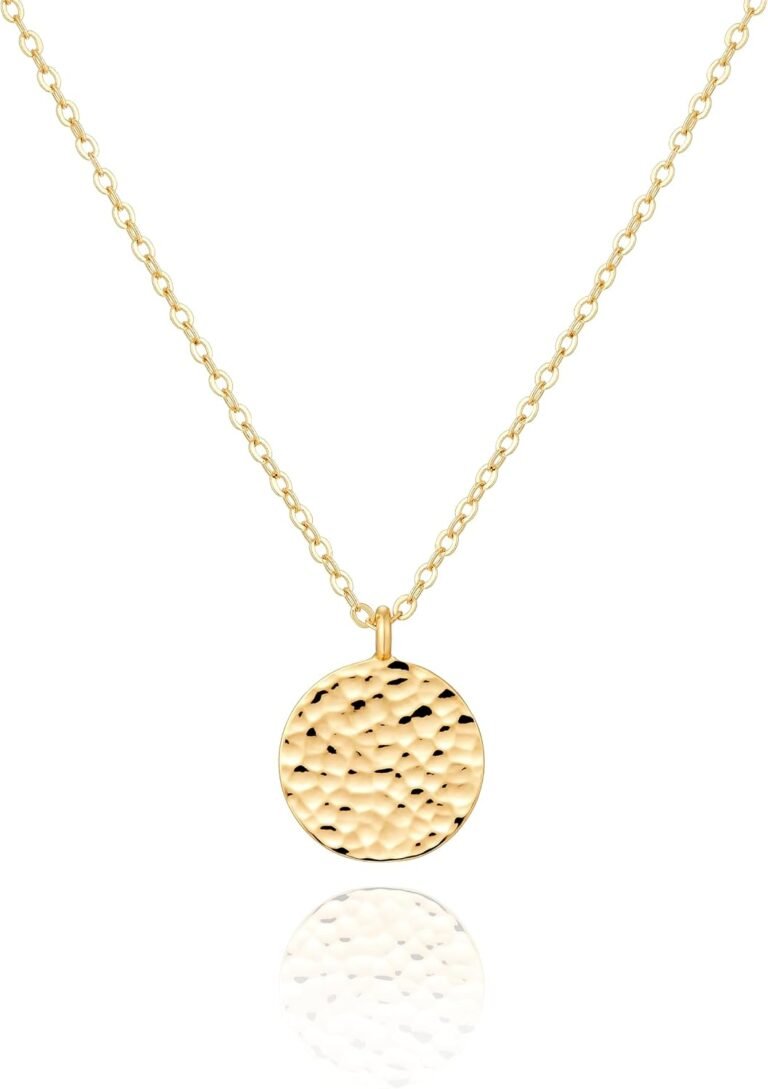
Now, think about the surface of your pendant. Do you want it smooth and shiny, or textured and matte? Smooth surfaces reflect light and look elegant. Hammered textures hide scratches and add an artisan feel.
You can also add details like engraving or stamping. A simple initial or a short word adds a personal touch. If you are working with clay, you can press leaves or lace into the surface for a unique pattern. The options are endless, so trust your style.
Finishing Your Pendant for Longevity
A great design needs a solid finish to survive daily wear. Finishing protects the surface and keeps your pendant looking fresh. Skipping this step can lead to scratches, tarnish, and disappointment later.
First, sand any rough edges with fine-grit sandpaper. Then, decide on your final coating. For metal, a clear lacquer or a polishing cloth can work. For clay or resin, a clear sealant is essential.
Protecting the Surface with a Clear Coat
Clear coat sprays and brush-on sealants act like a shield. They prevent oxidation and keep your pendant shiny. We recommend applying two thin coats instead of one thick one. This ensures even coverage without drips.
Let the clear coat dry completely before attaching the chain. This usually takes a few hours. If you’re in a hurry, use a fast-drying formula. Research and found that sealed pendants last twice as long as unsealed ones in daily wear.
Adding a Chain or Cord for the Perfect Look
The chain you choose is part of the design. A delicate cable chain works well for small, elegant pendants. A chunky cord or leather strap suits larger, bohemian pieces. The goal is balance between the pendant and the chain.
Make sure the jump ring is the right size for your chain. A tiny jump ring can break easily with a heavy pendant. Use a pair of pliers to close the ring securely. A quick tug test will tell you if it’s strong enough.
Essential Pendant Design Checklist
Before you finalize your design, run through this quick checklist. It covers the most common mistakes we see in DIY pendant making. Checking these boxes will save you from future headaches.
- Clear focal point: Your pendant has one main shape or symbol that stands out.
- Comfortable size: The pendant measures between 16mm and 25mm for daily wear.
- Secure bail placement: The hole is positioned so the pendant hangs straight or as intended.
- Material match: The metal and stones suit your skin tone and lifestyle.
- Protected surface: A clear coat or polish is applied to guard against wear.
- Proper chain fit: The jump ring size matches both the pendant and the chain.
Conclusion
Designing a necklace pendant is all about making smart choices that match your style. You started with a simple idea, picked the right shape, and chose materials that fit your daily life. The size, the hole placement, and the finish all work together to create something you will actually wear.
Now it’s time to put that plan into action. Grab some paper and sketch your final design. Cut out a quick template and test it on a piece of string. Once it feels right, you can move forward with confidence. Your perfect pendant is one small step away.
Frequently Asked Questions
What is the best metal for a beginner making a pendant?
Sterling silver is a great starting point for most beginners. It is easy to work with and forgiving if you make small mistakes. It also looks polished without a huge investment. You can always move to gold once you feel more confident in your skills.
How do I stop my pendant from flipping over when I wear it?
A pendant flips when the hole is placed too high or the bottom is heavier than the top. Try moving the hole slightly lower toward the center of the design. You can also add a small bead or weight at the bottom edge. A quick paper test will help you find the right balance.
Can I use polymer clay to make a durable pendant?
Yes, polymer clay is a fantastic option for custom pendant designs. It is affordable, comes in many colors, and bakes hard in a regular oven. Just make sure to cure it at the recommended temperature and time. A clear sealant will add extra protection against scratches and moisture.
What chain length should I use for a 20mm pendant?
For a 20mm pendant, you want a chain that lets the piece sit comfortably at your collarbone. An 18-inch chain works well for most people. If you prefer a lower hang, go with a 20 or 22-inch chain. The goal is to let the pendant breathe without feeling crowded.
How do I attach a pendant without a bail or hole?
You can use a pendant bezel or a glue-on bail for designs without a hole. A bezel is a metal frame that wraps around the edge of your piece. A glue-on bail is a small metal loop you attach to the back with strong jewelry adhesive. Both methods work well and keep your design intact.