How to Engrave a Ring: A Step-by-Step Guide
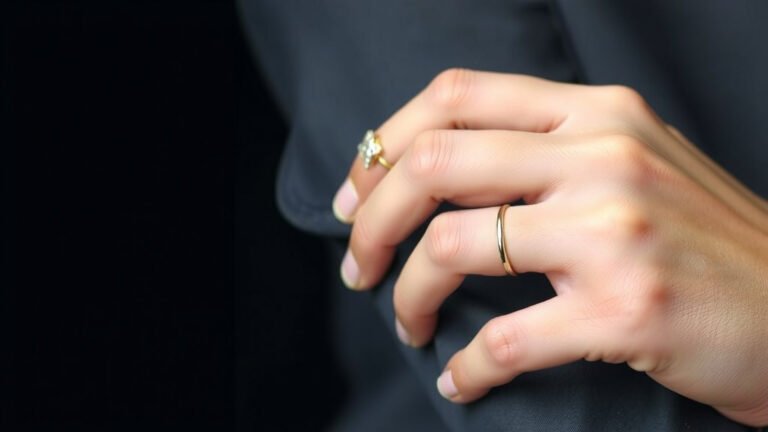
You can engrave a ring at home using a few different methods. For simple personalization, try a manual engraving tool or a rotary tool. These are accessible for beginners. For a more professional look, consider outsourcing to a jeweler. Engraving adds a special touch to any ring. It makes a piece truly your own.
Engraving can transform a plain band into a meaningful keepsake. You can add initials, a date, or a short phrase. Think about the ring’s material, too. Some metals engrave more easily than others. We found that understanding your ring’s metal type is key to a successful engraving. It also affects the tools you can use.
- Engraving adds personal meaning to rings.
- Manual tools are great for DIY projects.
- Rotary tools offer more control and options.
- Jewelers provide professional engraving services.
- Consider your ring’s metal type before engraving.
Ready to personalize your ring? Let’s walk through the best ways to engrave a ring, from simple DIY to professional techniques.
Personalizing Your Ring: Engraving Options at Home and Beyond
Engraving adds a personal touch to any ring. It can turn a simple band into a cherished memento. You have several options for engraving, from DIY methods to professional services. We found that understanding these choices helps you pick the best one for your needs and your ring.
DIY Ring Engraving Methods
You can achieve beautiful results right at home. It just takes the right tools and a little patience. These methods are perfect for adding initials, dates, or short messages.
Using a Manual Engraving Tool
Manual engraving tools are a great starting point for beginners. They often look like small, handheld pens. You use them to scratch your design onto the metal. It’s a bit like drawing, but with a harder tip. This method gives you full control over your design.
You’ll typically find these tools with a small, pointed tip. This tip is usually made of hardened steel or diamond. You grip the tool like a pen and press it firmly against the ring. Then, you carefully draw your design. Think of it like a steady hand creating art. It’s a very tactile process.
Tips for Manual Engraving
Practice is key with manual tools. Before you touch your ring, try on a piece of scrap metal. This helps you get a feel for the pressure needed. It also lets you practice different letter strokes. Consider sketching your design lightly on the ring first. A fine pencil mark can guide your hand. Always engrave in a well-lit area. Good lighting makes it easier to see your lines. Ensure the ring is stable while you work. You might need a small vise or a padded clamp. This prevents the ring from slipping.
Exploring Rotary Tools for Engraving
Rotary tools offer a bit more power and versatility. Think of tools like Dremel or similar brands. These are electric tools with rotating bits. You can attach various engraving bits to them. Some bits are for fine detail work, while others are for cutting deeper. Many people find these tools give a smoother finish than manual etching.
When using a rotary tool, it’s important to select the right bit. Diamond-tipped bits are excellent for harder metals. For softer metals, a steel bit might suffice. You’ll want to start with a low speed setting. Gradually increase it if needed. Too much speed can cause the metal to overheat or the bit to slip. Think of it as having different gears for your engraving.
Getting Started with a Rotary Tool
Safety is a big concern here. Always wear safety glasses. Metal shavings can fly, and you don’t want them in your eyes. A dust mask is also a good idea. You’ll want to practice on scrap metal first. Get a feel for the tool’s speed and pressure. Hold the tool firmly but don’t grip too tightly. Let the tool do the work. Moving too fast will create jagged lines. Rest your hand on a stable surface. This helps you maintain a steady hand. Consider a rubber mat under the ring. This can help prevent it from rolling.
Rotary Tool Accessories and Bits
Many rotary tools come with a basic set of bits. You might need to purchase specialized engraving bits. Look for bits designed for metal engraving. Different shapes, like ball or cone tips, create different line effects. Fine-tip bits are best for detailed lettering. Wider bits can be used for filling in areas or creating thicker lines. Some kits also include flex shafts. A flex shaft allows for more comfortable handling and detailed work. It’s like adding an extension to your tool.
Factors to Consider Before Engraving
Before you grab a tool, a few things need your attention. Your ring’s material and design play a big role. These factors influence how easy engraving will be. They also affect the final look. Understanding these can save you frustration.
Ring Material and Engraving Compatibility
Different metals engrave differently. Softer metals like gold and silver are generally easier to engrave. They take to most tools without much fuss. Platinum is harder, requiring more pressure or specialized tools. Stainless steel and tungsten carbide are very hard. They are often difficult to engrave with DIY tools. Many experts recommend professional engraving for these materials. We found that knowing your metal is essential for a good outcome.
Here’s a quick look at how common metals engrave:
| Metal Type | Ease of Engraving (DIY) | Notes |
|---|---|---|
| Gold (Yellow, White, Rose) | Easy to Moderate | Softer metals, takes engraving well. 14k is easier than 18k. |
| Silver (Sterling) | Easy | Relatively soft and easy to mark. |
| Platinum | Moderate to Difficult | Harder metal, requires more pressure or diamond tips. |
| Titanium | Difficult | Very hard, requires specialized tools and often professional help. |
| Tungsten Carbide | Very Difficult | Extremely hard, usually needs laser engraving. |
| Stainless Steel | Difficult | Harder than silver or gold, can be etched or laser engraved. |
Ring Design and Engraving Space
The shape and thickness of your ring matter too. A plain, flat band offers the most space for engraving. Curved or detailed rings can be trickier. Engraving on the inside (shank) is common. It’s usually easier because the surface is flatter. Engraving on the outside of a very detailed ring might be impossible. You might not have a smooth surface to work on. Always check the available space. Some rings have very little room for text.
Professional Ring Engraving Services
If DIY feels too daunting, or your ring material is tricky, a jeweler is your best bet. Professional jewelers have specialized equipment. They also have the skills to create precise and beautiful engravings. This is often the **safest route** for valuable or delicate rings.
What Jewelers Offer
Jewelers use a few main types of engraving machines. One common type is a diamond-tipped engraver. It’s similar to a rotary tool but much more precise. Many now use laser engraving. Laser engraving is incredibly accurate. It can create very fine lines and detailed designs. It works on almost any metal. This is especially true for very hard materials like tungsten. We found that laser engraving offers unmatched precision and detail.
Choosing a Jeweler for Engraving
Look for a jeweler who specifically offers engraving services. Ask to see examples of their work. This helps you gauge their style and quality. Discuss your desired design and the ring’s material. They can advise you on what’s possible. Get a clear quote for the service. Turnaround times can vary. It’s usually a quick process, often a few days to a week. It’s worth the wait for a perfectly engraved piece.
Engraving Checklist: Get Ready to Personalize!
- Identify your ring’s metal type.
- Choose your engraving method (DIY or professional).
- Decide on your design or text.
- Practice your chosen method on scrap material.
- Ensure your workspace is clean and well-lit.
- Take your time and engrave with care!
Conclusion
You now have the knowledge to engrave your ring, whether you’re a DIY enthusiast or prefer professional help. We’ve shown you that manual tools offer direct control, while rotary tools provide smoother results. Remember, knowing your ring’s metal is essential for success. For challenging materials or intricate designs, a jeweler’s expertise is unmatched. Engraving is a wonderful way to add lasting personal meaning to your jewelry. Your next step is to choose the method that best suits your ring and your comfort level. Then, start personalizing!
Frequently Asked Questions
Can I engrave a ring made of tungsten or titanium at home?
Engraving tungsten or titanium at home is very difficult. These metals are extremely hard. DIY tools often struggle to make a mark. We recommend seeking professional engraving services for these materials. Jewelers use specialized tools like laser engravers for these tough metals.
How do I prevent my ring from moving while I engrave it?
Keeping your ring stable is important for a clean engraving. You can use a small vise with padded jaws. A rubber mat under the ring can also help prevent it from rolling. For rotary tools, resting your hand on a stable surface adds control. Practice on scrap metal first to get a feel for stability.
What’s the difference between manual and rotary tool engraving?
Manual engraving tools are like pens; you scratch the design by hand. This gives you total control but requires a steady hand. Rotary tools use a spinning bit, offering more power and a potentially smoother finish. We found rotary tools can also engrave faster with the right bit.
How deep should I engrave my ring?
The depth depends on your desired look and the metal. For simple personalization, a shallow engraving is often best. This ensures it doesn’t wear away quickly. For harder metals, deeper cuts require more effort and specialized tools. Always practice on scrap material to test depth and pressure.
Is it safe to engrave my wedding ring?
It can be safe if you take proper precautions. For DIY methods, practice first and use steady movements. For valuable rings, consider professional engraving to avoid mistakes. Always wear safety glasses when using power tools. A jeweler can ensure your wedding ring is engraved beautifully and safely.